Install WordPress On Your Local Computer Using Bitnami/XAMPP. And Create Website In WordPress locally.
Hi Guys, Today, I’ll be showing you how you can install WordPress Locally on your computer. Now, Why would you want to Install WordPress locally? Normally, if you want to build a WordPress site, you would need to buy a domain and hosting, and then launch your live website. But if you don’t want to launch a website yet, and just want to try and test WordPress. So, we will learn how to install WordPress in localhost on your computer. You can do that by reading this article.
Okay! So, when you install WordPress locally, all your website’s files will be stored on your computer, and this means only you will be able to access your website.
Get 200+ Hours Free Courses.
Now, this is a great way for you to learn to make your website free of cost. And, once you’ve built your WordPress site locally, you can then move it to a live website.
I’ll show you how you can do that in the later part of this article. So keep reading. And now, let’s install WordPress locally!
Okay!
It is going to be totally free and we’re going to do it in just 2 simple steps! First, we’re going to download a software called ‘Bitnami WordPress”.
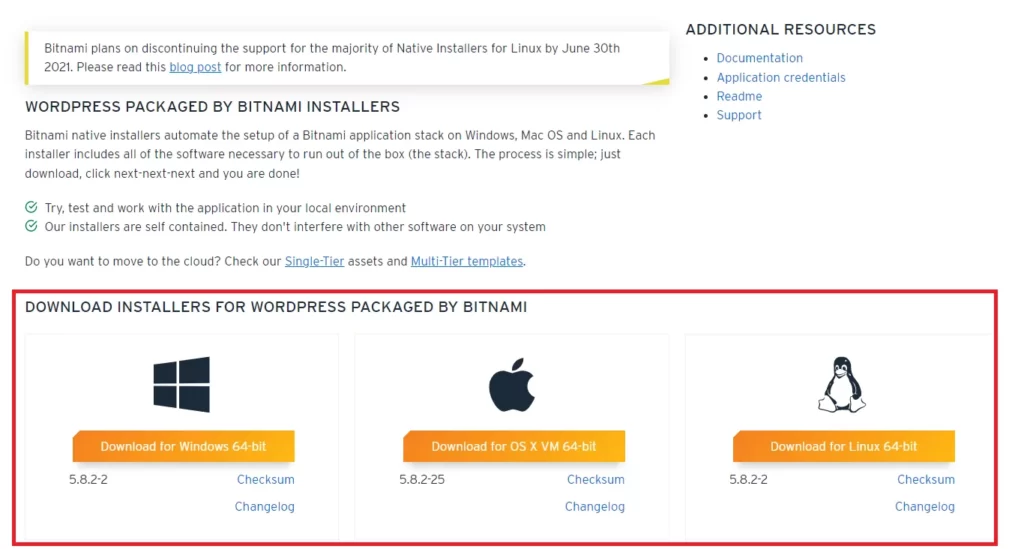
Now, this is the software which is going to allow us to run WordPress on our computer. So to download it, let’s go to our browser. And, then search for ‘bitnami WordPress” and press enter. Now, click the first link And then download bitnami, by clicking here And clicking this link.
Okay!
So the bitnami software is downloaded! Now, let’s go to step 2, which is to install this software. So let’s open the file we’ve downloaded. And, click ‘Ok’ Now keep clicking ‘next’ till you reach this page.
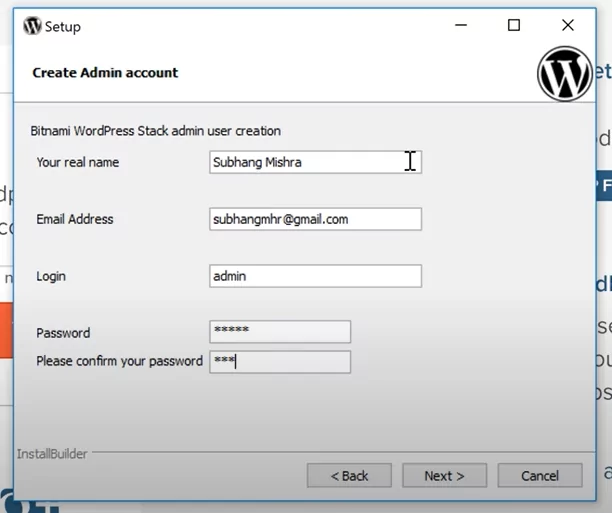
Okay! So this is the page, where we need to enter the login details of our local WordPress site. So enter your name, email address and then the username and the password for WordPress. make sure you remember these details as you’ll be needing this to login into your local WordPress site.
Once you’re done, keep clicking next And WordPress will be installed. Now let’s click finish! And it will take you to this page. So, WordPress is now installed on our computer.
Now to access your site, you just have to click ‘access WordPress. So let’s click that And as you can see, our WordPress site is now running on our PC!
Okay!
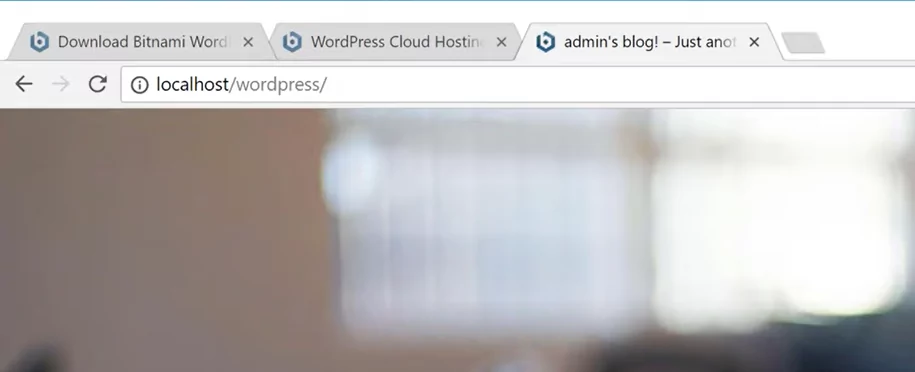
You can access your site anytime by going to “localhost/WordPress” on your browser. Now WordPress to log in to WordPress, you just add “/login”. And, it will take you to the login page of WordPress.
You can now login, by entering the details that you gave during the installation. So, once you’ve logged in, you can start building your website.
So this is how you can Install WordPress locally on your PC and start building your website. Once you’ve completed building your website you can then move it to a live website, by watching this video, here! We show you how you can move from localhost to web host.
Video Tutorial 👇
Want to get some free courses? Then check our all the free courses here.
Want more blogs? Get More Knowledge. Read this.

